

How To Flash The Updated Android 5.0 Lollipop

After living up to its promise of delivering a preview of the mysterious Android L (now Android Lollipop) a few months ago, Google has now rolled out an API-complete updated preview for the Nexus 5 and Nexus 7 (2013). If you have one of those devices and you don’t mind factory resetting, you can experience the latest and greatest of Android in its nearly finished form. All you need are a few files and some patience.
Before we get started, these images will work on any Nexus 5 (Hammerhead), even one that you bought direct from T-Mobile or Sprint — they are all identical unlocked devices. The Nexus 7 image only works on the WiFi N7 released last year (Razor). The 2012 Nexus 7 and the newer LTE variant are not supported by this image. There is some risk in doing this, but most mistakes can be undone by flashing the stock image back on your device. That’s the beauty of a Nexus.
Grab your trusty USB cable and plug in your phone or tablet. Make sure USB debugging is enabled in the settings and download theAndroid SDK and Android Lollipop image for your device. Note, Google’s download page is acting a bit wonky as the images are going live Friday, October 17th. Launch the SDK Manager and install the drivers and development tools, but don’t worry about the emulation targets for various versions of Android. You won’t need any of that. Back up anything on your device you can’t bear losing before proceeding.
Boot your phone or tablet into the bootloader by shutting it off and then holding the power and volume down button until you get to a mostly black screen with system information and the Android mascot laying down on it. Verify that your device is detected properly by opening a command prompt (or terminal on Mac) in the platform-tools folder from your Android SDK directory. Then type fastboot devices. If you see a serial number, all is well. Remember, on a Mac most commands need to be prefaced with a ‘./’ string. If you are not bootloader unlocked already, use fastboot oem unlock from a command prompt to unlock and reset the device. Get back into the bootloader to proceed.
When you download the Android L image, it will be a .tgz file. Use your favorite archiving program (I like 7-Zip) to open that file and pull out the .tar file. Then do the same thing with the .tar, but this time you’ll get a folder containing six files. Move all of those directly into the platform-tools folder (that’s the one that will have fastboot and ADB executables in them).
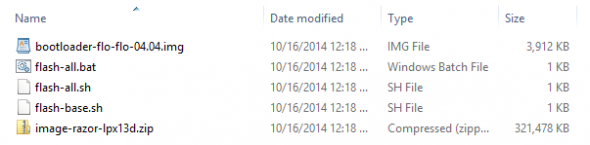
Here comes the moment of truth — with your device still connected via USB and in bootloader mode, launch the flash-all.bat (Windows) or flash-all.sh (Mac) file. You may need to run these as administrator. A window will appear and tell you that it’s pushing files over to the device, then it writes the new system data and (hopefully) installs Android L. Don’t worry if you get errors about recovery.sig and boot.sig being missing. This might still fail the first time, but don’t worry–you can just run the script again.
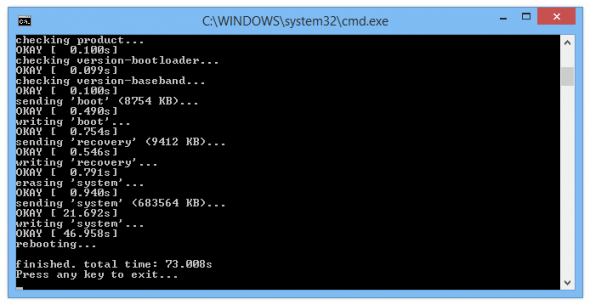
When the flashing has completed, your phone or tablet will reboot. It’s going to take at least five minutes for the first boot into Android 5.0 Lollipop. If something goes sideways, you can always get back into the bootloader and try the flash again. Remember, this is a still developer preview, just a more polished one. There might be a few bugs and broken features, but this image is supposed to let developers make sure their apps are ready to go once the final build starts rolling out next month.
You may also like...


![]() © 2024
© 2024
0 comments