

What Is An APN, And How Do I Change It?
Having the right mobile network settings makes a difference
Two or three years ago, any smartphone fan in the U.S. would have called you crazy if you were to predict how the telecom networks have changed. Verizon and Sprint have phones that can run on AT&T or T-Mobile, cheap pre-paid plans give you as much or more than any of the big four for less money, and people are starting to move away from the multi-year carrier contract model. Our pals in Europe can laugh at us, but these are all new ideas on this side of the pond.
Because we’re swapping SIM cards (and networks) more than ever, we’re exposed to the APN settings on our phones. And a lot of us have some questions.
We have answers.
What is an APN
The Access Point Name (APN) is the name for the settings your phone reads to set up a connection to the gateway between your carrier’s cellular network and the public Internet.
You carrier reads these settings, then does things like determine the correct IP address, connect to the correct secure gateway, and see if you need a private network like a VPN. All the heavy lifting is done on the carrier side, but we need to make sure the right settings are in place to get on the network we need, in the way we need to connect.
Depending on how your carriers network is structured, different settings are mandatory. The rest can be slightly altered to change some of the parameters, but for most of us we will need to use the exact settings provided by our carrier.
The good news is that most of the time, your phone already has these settings in the system files, and can fill in the APN information automatically when it connects. Small changes are often sent via SMS once the core connection is made. For example — inserting a Cricket SIM card will cause your phone to fill in the APN settings for a standard AT&T-based pre-paid carrier. Once that’s done, you’ll get a text with a download for “better” settings that optimize your connection. This sounds like a lot of work, and it is. But automated ways of entering settings and updating them mean less support calls.
But not every APN will fill in by itself on all phones. Sometimes, you’ll have have to dig in an do it yourself.
How to change your APN
For most phones, this will be done the same way. Of course, Android manufacturers can (and do) change things in the settings, so the process on your phone may be slightly different.
The first thing you’ll need to do is find the right APN settings for the network you want to use. You’ll be able to find these at the support pages at the carrier website. The settings will look like this example for Straight Talk:
- NAME: straight talk
- APN: tfdata
- PORT: 80
- MMSC: http://mms-tf.net
- MMS PROXY: mms3.tracfone.com
- MMS PORT: 80
Once you have this information at hand, grab your phone.
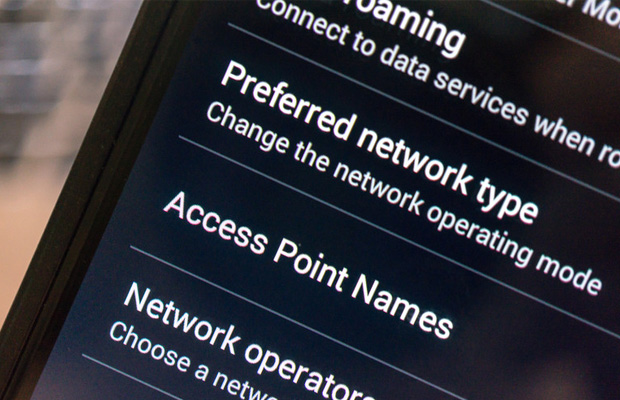
Open the settings, and look for Wireless and Network settings. Once there, look for an option to see “more”. You’ll be presented with a list of options to select, and we’re looking for something labeled “mobile networks”.
Once you’ve found your mobile network settings, the rest will be the same on all devices. You’re looking for the “Access Point Names” section. Tap to open it.
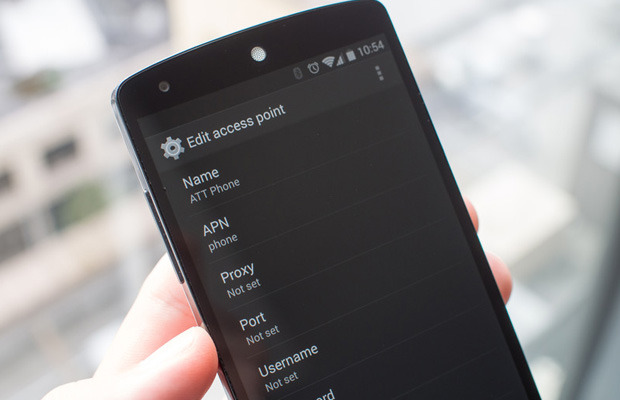
You should see a list with at least one APN on it. If things aren’t working with the current APN, you need to add another. Don’t modify or delete the one you see, instead make a new one and we can choose it when we’re done. At the top of the page, or possible in a menu if your phone has a menu button, press the plus sign to bring up the “Edit access point” screen.
This is where you will enter the settings you got from your carrier’s website. Two very important things here:
- Not every setting in the “Edit access point” screen will need filled in. Only fill in the items your carrier provides, and leave the rest as-is.
- Be sure to type in everything exactly as provided by your carrier. For example, default,supl,hipri is different than default, supl, hipri because of the spaces between items. Your carrier’s system is set up to read an expected set of values, and any changes — no matter how minor — can and will break things.
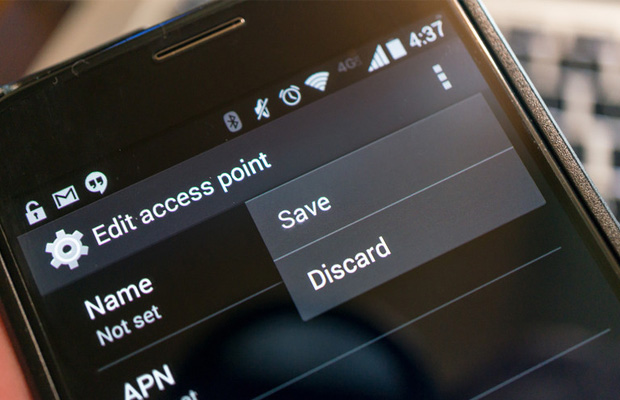
Once you have the settings provided by your carrier entered, you need to save the APN. You do that by pressing the three dots in the upper right (or the menu key if your phone has one) and selecting the “Save” option.
Once your APN information is saved, go back one screen to the list we saw earlier. On this screen, tap the new APN settings you just entered to make them active.
Most times, you’ll need to physically reboot your phone to use a new APN setting, but once properly entered, chosen and working, your phone will choose the correct one automatically whenever it’s rebooted or Airplane mode is toggled.
You may also like...


![]() © 2024
© 2024
0 comments